
Step-by-Step Chimney Installation for Indian Homes – Real Layout Advice
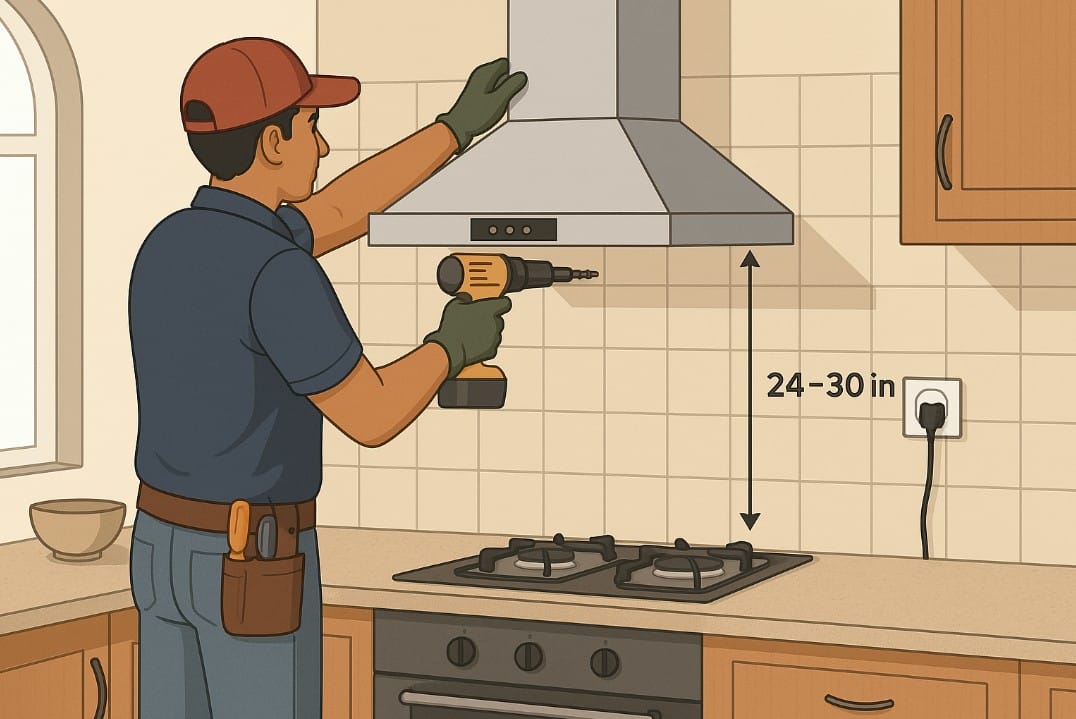
In Indian homes, kitchen sizes and layouts vary widely some have compact counters, others have tiled walls, tall windows, or oddly placed power sockets. That’s why chimney fitting often goes wrong: it’s either too high, blocked by cabinets, or not ducted properly.
If you want your chimney to actually work pull smoke, remove oil, and reduce smells you must install it correctly. This guide gives you real, practical advice on chimney placement, height, wall selection, ducting, and electrical setup tailored for Indian kitchens.
1. Measure Your Stove Area First – Chimney Should Cover It Fully
Why this matters:
If your chimney is smaller than your stove, smoke will escape from the sides.
| Stove/Hob Type | Recommended Chimney Size |
|---|---|
| 2-burner | 60 cm chimney |
| 3- or 4-burner | 90 cm chimney |
Quick Check:
Measure your stove width in cm – choose a chimney at least that wide or slightly wider.
2. Mark the Ideal Chimney Height – Use This Simple Formula
Basic rule:
Distance from gas stove to chimney hood should be 24-30 inches for wall-mounted chimneys.
- If your platform is 34 inches high (average in India), place the chimney bottom at 58 to 64 inches from floor.
Why it matters:
- Too low = risk of heat damage, blocked view, and head bumps
- Too high = smoke escapes, suction becomes weak
Mark the stove area on wall first, then use a tape measure upward.
3. Choose the Right Wall – Not All Walls Are Chimney-Friendly
You need:
- A wall that allows external duct outlet (connects to outside)
- Enough flat space above stove (no low cabinets or windows)
| Wall Type | Is it Suitable? |
|---|---|
| External wall with empty upper section | Best |
| Wall with window above stove | Bad – wind breaks suction |
| Corner wall with cabinets on both sides | Only with corner chimney |
| Internal wall (no duct exit possible) | Avoid – limits ducting options |
4. Plan Your Ducting Path – Shorter is Stronger
Good Duct Setup:
- Straight pipe, short as possible
- Maximum 2 bends (elbows), no sharp turns
- Pipe diameter at least 6 inches (150mm)
- Use aluminum, stainless steel, or rigid PVC
- Route pipe to outside wall or window using hole or false ceiling
Common Mistake:
Flexible plastic pipe = cheaper, but cracks and blocks quickly.
5. Place the Electrical Socket Before Installing the Chimney
Most chimneys use 10A-15A 3-pin plug and need:
- A socket placed 6 to 12 inches above the chimney unit
- Not directly behind chimney – hard to access later
- Preferably to the side or just above the duct cover
If you’re renovating:
- Ask your electrician to install a dedicated socket at chimney height
- Hide wiring inside the cabinet or wall channel
6. Real-World Layout Tips for Indian Homes
Small kitchens in 1BHK or flats
- Often limited wall height or cabinets above stove
- Use compact 60cm chimney with 1-meter duct
- Ensure you have space for oil tray access
Modular kitchens with full overhead storage
- Plan chimney cutout while designing cabinet
- Avoid cabinets directly above chimney hood
- Use a built-in or curved glass chimney
Homes with stove under window
- Do not install chimney here
- Shift stove to another wall or install exhaust fan instead
False ceiling?
- Ask technician to plan pipe before false ceiling is installed
- Use ceiling cutout or loft duct routing
7. Chimney Installation Checklist Before You Call the Technician
- Chimney size matches stove
- Wall is suitable and duct path is clear
- Hole for pipe is ready (or discussed with technician)
- Socket is installed and accessible
- Pipe kit (included or bought separately) is ready
- Oil collector tray has space for removal
- Chimney height is marked at 24–30 inches from stove
Take a photo of your kitchen wall and show it to the chimney brand’s technician or installer – they’ll help confirm ducting options in advance.
Summary – Fitting a Chimney Correctly in Indian Kitchens
Installing a chimney isn’t just about drilling it into the wall. In Indian kitchens, where space, height, and layout vary from home to home, proper planning makes a big difference. A wrongly placed chimney will not only perform poorly but also create long-term problems like smoke leakage, excess heat, and difficult cleaning.
Use this fitting checklist to avoid mistakes:
| What to Plan | Best Practice |
|---|---|
| Chimney Size | Match stove width: 60cm (2 burners), 90cm (3-4 burners) |
| Installation Height | 24-30 inches above stove surface (not floor) |
| Wall Selection | External wall with no cabinets or window above |
| Duct Pipe Setup | Short, straight, max 2 bends, at least 6-inch diameter |
| Socket Placement | 6-12 inches above chimney, not hidden or blocked |
| Oil Tray & Filter Access | Keep side and top clearance for cleaning access |
If you’re planning a new kitchen or upgrading an old one, it’s always better to finalize chimney placement before tiles or cabinets are installed. And if you’re hiring a technician, don’t leave it all to them check these things yourself.
A well-fitted chimney won’t just work better it’ll keep your kitchen cooler, cleaner, and easier to manage every single day.

