
Connecting Your Solar System to the Local Electricity Grid
So your rooftop solar system is installed. The panels are aligned, the inverter is powered on, and everything looks perfect. But unless your system is connected to the local electricity grid, you’re not yet getting the full benefit including:
- Bill credits through net metering
- Government subsidies (PM Surya Ghar)
- Exporting excess energy for actual savings
Here’s what you need to know to complete your solar journey and plug into the grid the right way.
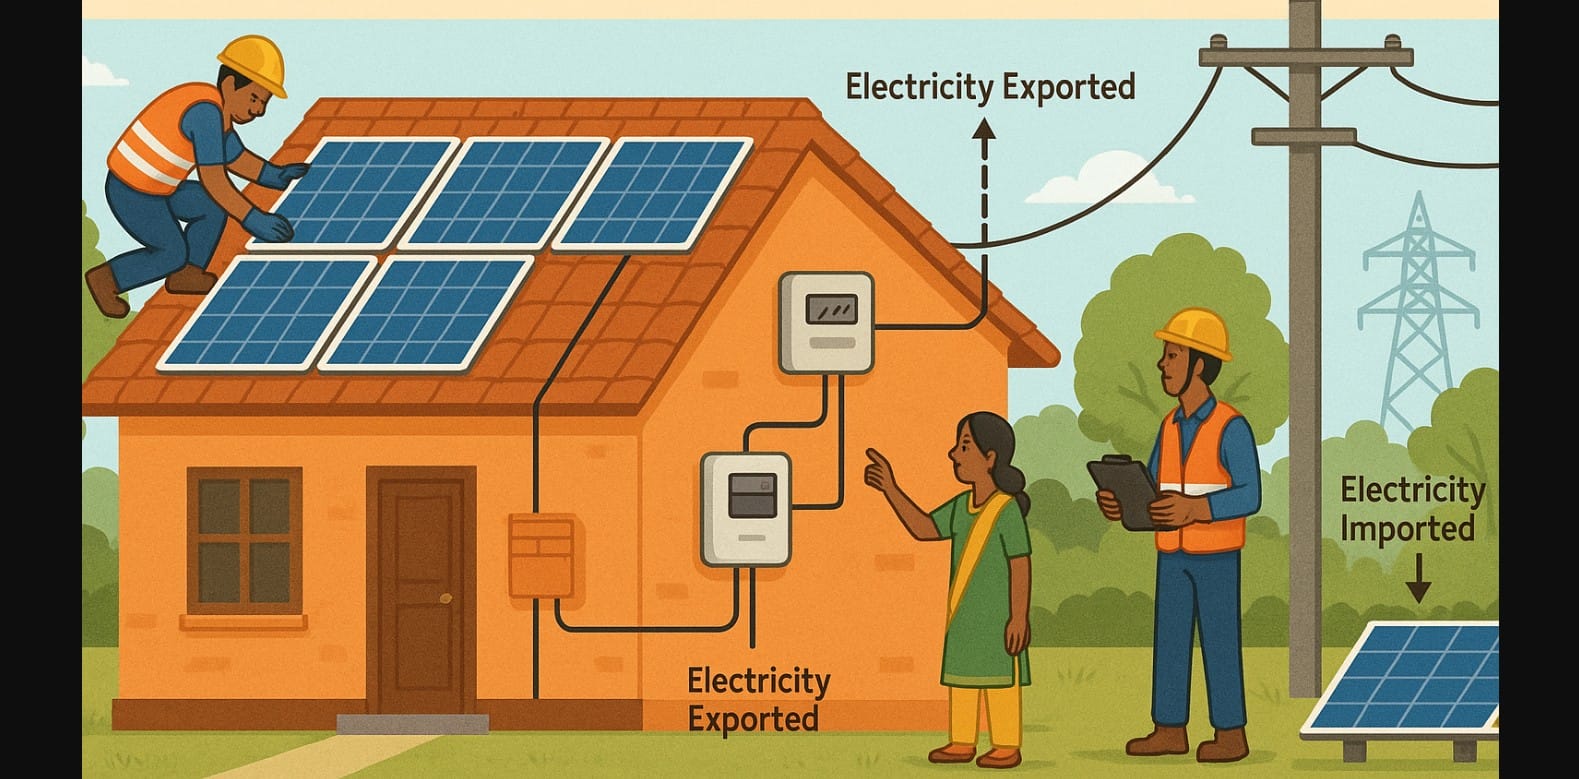
1. What Is a Grid-Tied Solar System in India?
A grid-tied system is one where your home:
- Uses solar power first during the day
- Sends any excess electricity back to the utility grid
- Draws power from the grid at night or during low solar production
- Tracks this through a net meter, which shows both imported and exported units
This system allows you to reduce your bill by offsetting your monthly usage with exported solar units.
2. Step-by-Step: How Grid Connection Works in Indian Homes
Step 1. Installation Is Completed
- Your vendor installs panels, inverter, wiring, earthing, and safety gear
- System is tested and confirmed to be working internally (but not yet grid-synced)
Step 2. Net Metering Application Is Filed
- Your installer applies to the DISCOM (electricity board) on your behalf
- Submitted documents include:
- Aadhar card
- Latest electricity bill
- Ownership proof (property tax receipt or sale deed)
- System design and inverter specs
- Empanelment proof of the installer (for PM Surya Ghar)
In some states, this is done through an online portal, while in others, paper applications are still common.
Step 3. DISCOM Review and Site Inspection
- The local utility reviews your application
- Within 1-2 weeks, they schedule a field visit
- The DISCOM engineer checks:
- Panel placement and capacity
- Mounting and wiring safety
- Correct inverter model and earthing
- Compatibility with grid voltage and standards
Step 4. Bidirectional Net Meter Is Installed
- Once approved:
- The old energy meter is removed
- A net meter (which tracks both import and export) is installed and sealed
- The inverter is switched to grid-synchronized mode
Step 5. Grid Synchronization and System Go-Live
- Your solar system now starts:
- Sending excess power to the grid
- Drawing from the grid only when needed
- Your monitoring app shows:
- Solar generation
- Grid import
- Grid export
- You begin receiving monthly bill credits for exported units
3. Who Handles the Solar to Grid Connection Process?
- In most Indian states, your installer handles everything
- Your role as homeowner:
- Share valid documents
- Pay any DISCOM processing fees (if required)
- Sign the net metering agreement (digital or paper)
- Keep track of your application status (ask for reference number)
4. Solar Net Meter Installation and Grid Approval Process Timeline
| Step | Estimated Time |
|---|---|
| Application filing | Day of installation |
| DISCOM review | 7-15 days |
| Site inspection | 5-10 days after review |
| Meter installation | 3-7 days after approval |
| Grid synchronization | Same day as meter install |
Total time = around 2 to 4 weeks from installation to final grid connection
5. Is Grid Connection Mandatory for Subsidy?
Yes. Under the PM Surya Ghar Yojana:
- Your system must be:
- Installed by a registered vendor
- Grid-tied
- Visible in the national rooftop solar portal
- Only after the net meter is installed and system is grid-synced, the subsidy amount is released (to your bank account)
6. Documents Typically Needed for Grid Integration
| Document | Provided By |
|---|---|
| Electricity bill copy | Homeowner |
| Aadhar or other ID | Homeowner |
| Property tax receipt or sale deed | Homeowner |
| Installer empanelment certificate | Vendor |
| System layout and specs | Vendor |
| Net metering application form | Vendor or DISCOM |
Always ask your installer for a copy of your application or online submission ID
7. Avoid Grid Tie Delays
- Choose a vendor registered on pmsuryaghar.gov.in and with your local DISCOM
- Make sure your documents are clear and match your electricity connection name
- Stay in touch with your vendor after installation follow up every 5-7 days
- In metros and Tier-1 cities, net meter demand can be high apply early
8. What to Expect After Going Live
Once grid-connected:
- Your inverter’s display or app will show:
- Instant generation
- Energy exported to the grid
- Power drawn from the grid
- Monthly bills will reflect:
- Net consumption (import – export)
- Any carry-forward units (state-specific rules apply)
- Your subsidy status will show “Installation Verified”, and payment will be processed
9. Your Solar Grid Connection Completion Checklist
| Step | What to Confirm |
|---|---|
| Net meter application filed | Ask for reference or submission ID |
| DISCOM inspection scheduled | Confirm date or engineer visit |
| Meter replaced with net meter | Old meter removed, new one sealed |
| Inverter synced to grid | Exporting power shown in display/app |
| App showing live data | Daily export/import visible |
| Subsidy portal updated | Installation marked “verified” |
10. Grid Connection Required for Solar Savings and Subsidy in India
Even the best solar system won’t cut your bills until it’s officially connected to the grid. Grid tie is not just paperwork it’s what enables your system to talk to your DISCOM, send back extra energy, and earn you credits.
Keep track of the process, request updates, and don’t consider your solar journey finished until the net meter is installed and working both ways.

